

How To Draw Ears Front View
Learn ear cartoon tips and tricks to brand your graphic symbol illustrations more realistic! Eridey explains in detail how to draw ears from different angles and how to apply the nuts to fantasy characters like fairies.
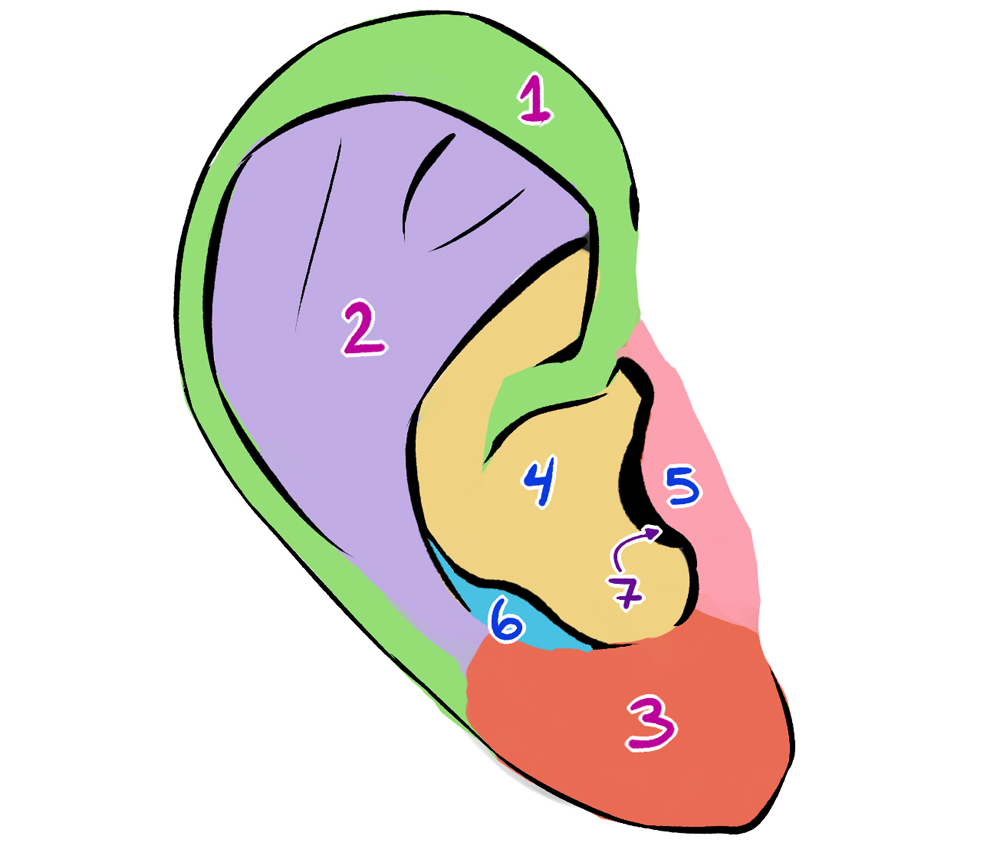
Ears are unique and, even if they come by pairs, at that place aren't ii cut from the aforementioned mold. Let's run across a bit of their mutual basic structure earlier we beginning with their diversities:
- Helix
- Antihelix
- Lobule or lobe
- Concha
- Tragus
- Antitragus
- Ear canal
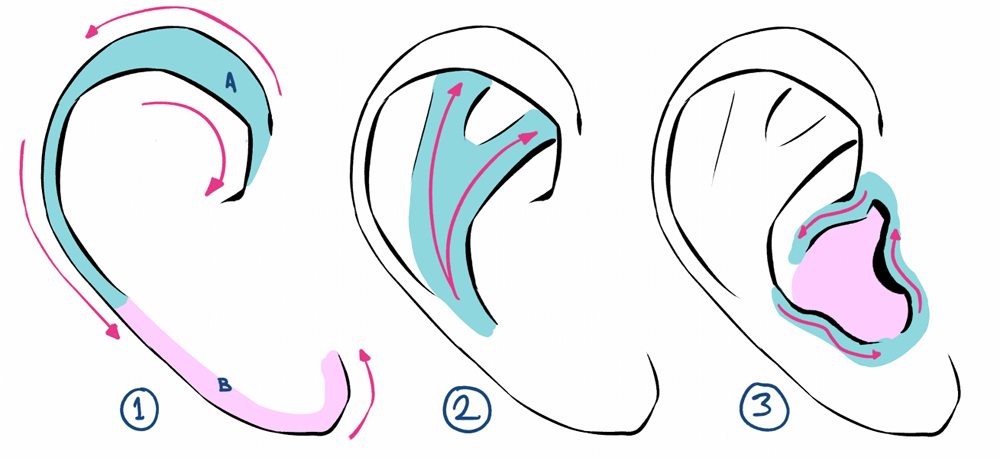
In general terms, all ears follow the aforementioned bones structure. A magic formula! Practice a couple of times to learn it by heart. You can employ the sketch higher up to go through the following steps.
- The contour of the ear is created from the helix; and the lobe, as you can encounter, consists of a single stroke. The helix has the shape of a hook (A) and the lobe is a smaller curve at the end of the ear (B).
- The antihelix spreads out starting from the lobe and creates ii paths which meet the internal border of the helix.
- The terminal strokes are the tragus (which covers the ear canal) and the antitragus. You tin can also close the inner part of the helix curve a trivial more.
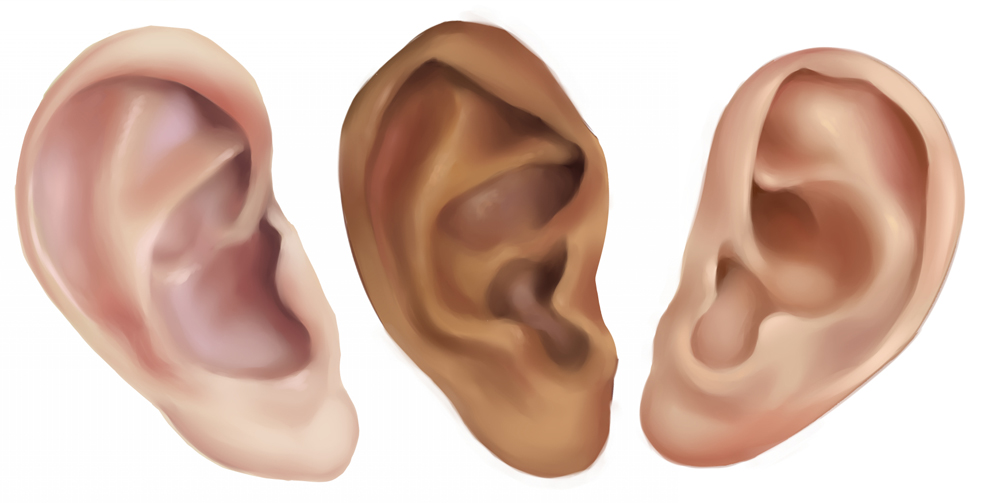
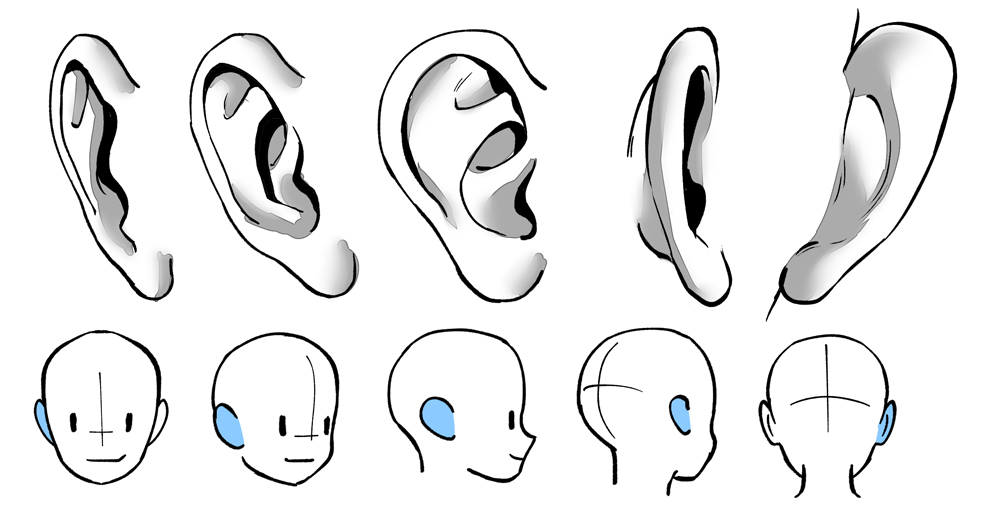
In the following examples, we volition observe that some features are more pronounced or more subtle than others, merely it is easy to identify each part of the ear, and then if you draw from your imagination, comport in mind that your purpose is to create comprehensible shapes:
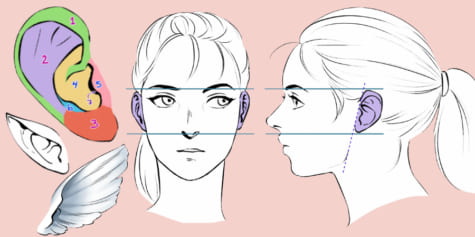
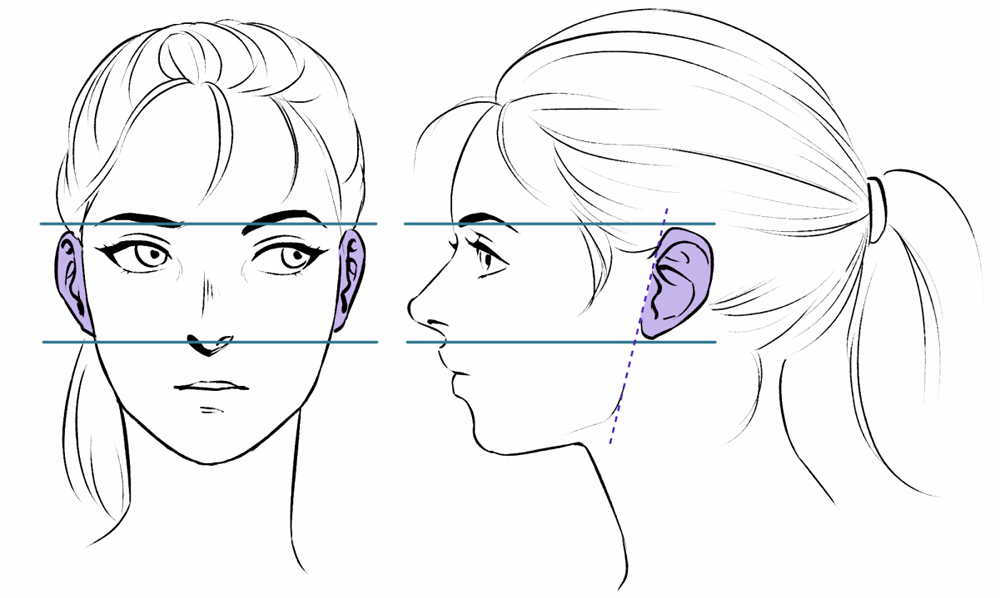
Shape, placement and angles:
Information technology is keen that beefcake is and then perfect that it allows us to use various reference points to determine the position and size of other elements. In the case of ears, the eyebrows and the tip of the nose human action as guidelines to draw them at a suitable meridian and size. Y'all tin also follow the jaw line as a guideline for the right angle.
If our character is looking looks up or downwardly, nosotros tin can even so utilise the same guides. Just remember that in a three-dimensional arroyo, the caput is a sphere and the location of the ears remains the same.
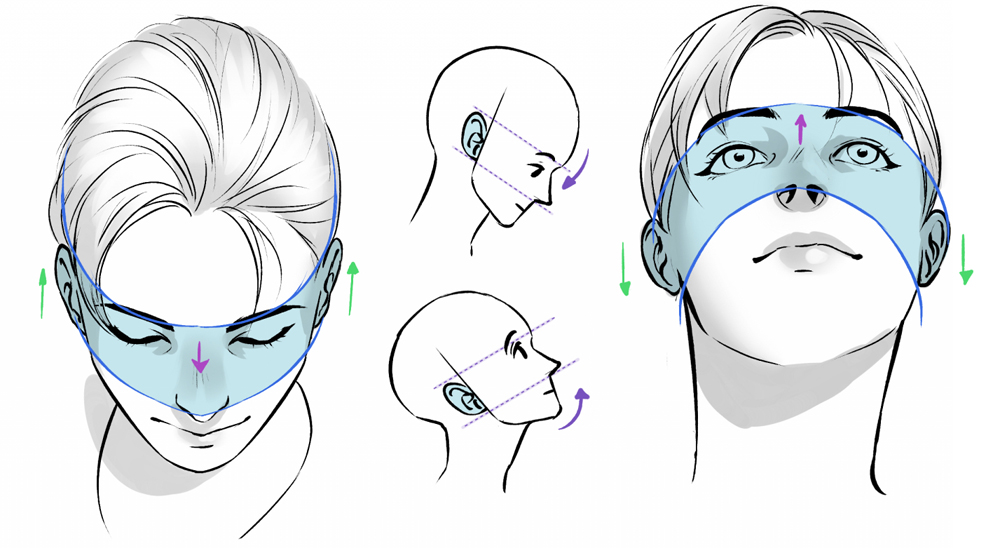
What does change is the perspective from which you are looking at the paradigm. Therefore, let usa not forget how ears are viewed from other angles.
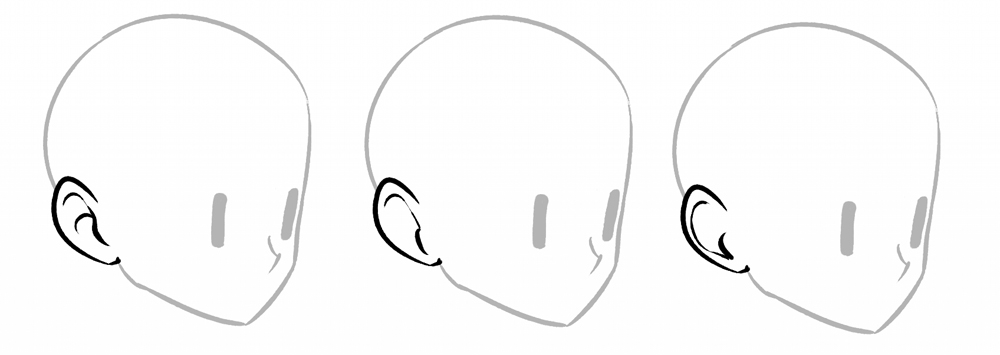
Stylizing:
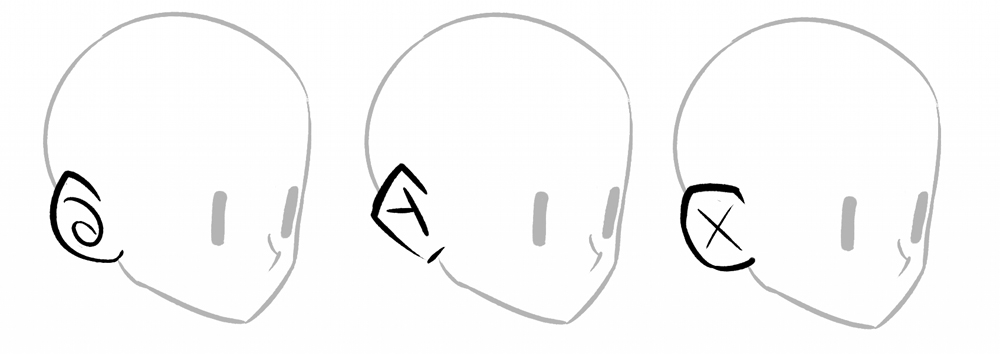
We've come this far, and we take realized that cartoon ears isn't that impossible. However, for those whose job or hobby tends more than toward animation or comics, saving fourth dimension in the details is crucial. Endeavour getting rid of the lines that aren't necessary:
My advice is to soak in the styles that yous like the best and look closely at how your favourite artists draw ears. Some of them fifty-fifty change the pattern of the ear, like an 10 or a half dozen!
Fantasy ears:
Is our character… human? Or from another planet?! The classic, and well-nigh obvious, way to tell humans autonomously from magical creatures is to expect at their ears. This topic is fun, we are free to experiment with exaggerated and unique proportions.
Elves and faeries:
Pointy, long ears have become a symbol of magic, wisdom, and immortality, since they are the characteristics that these kinds of beings generally possess. We already know what a human ear looks like, and so let us utilise the aforementioned design to other silhouettes. In this example, something like a teardrop.
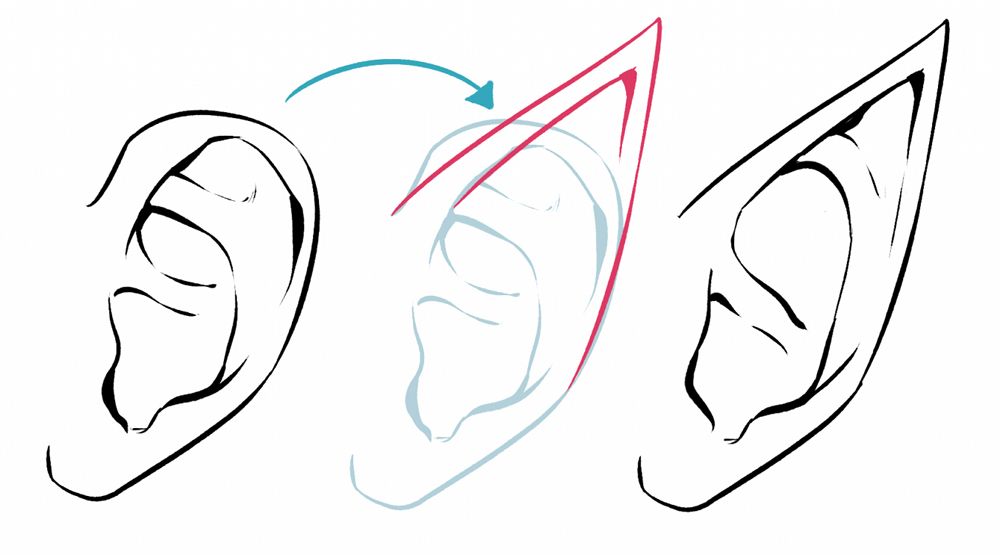
We can simplify this ear in the same as earlier:
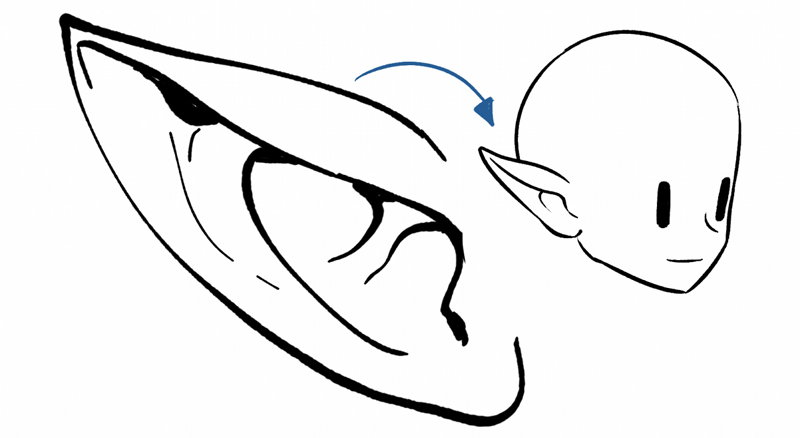
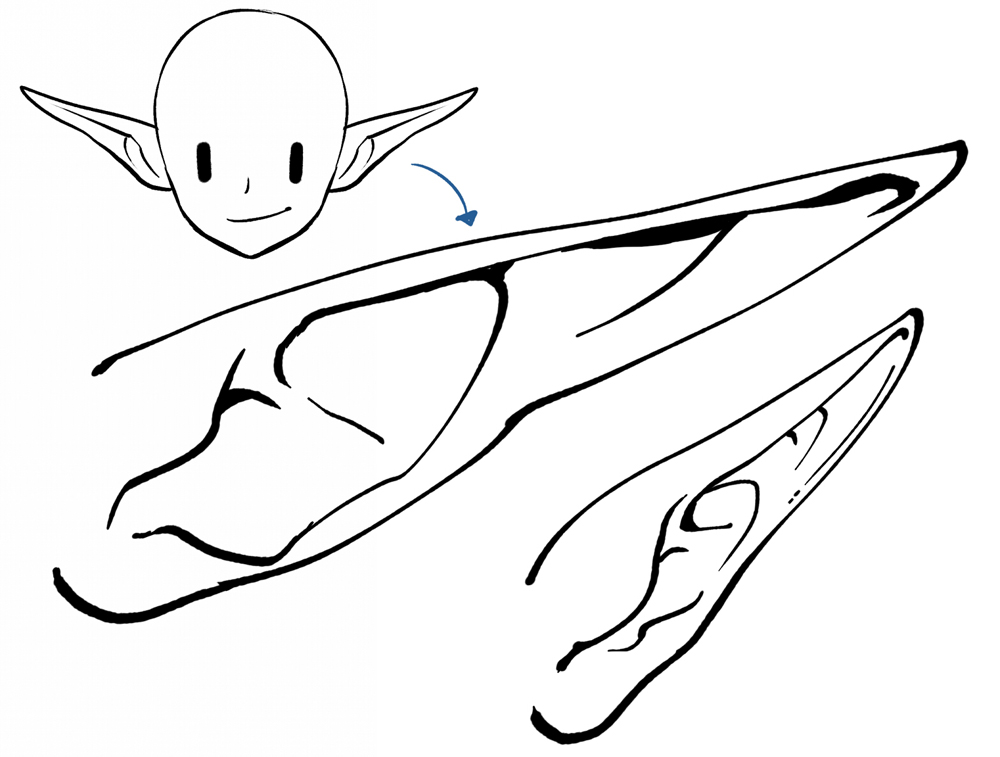
If nosotros place the ears where they should go and keep a regular size (at least at the base of operations), they will look quite credible, no matter how exaggerated they are.
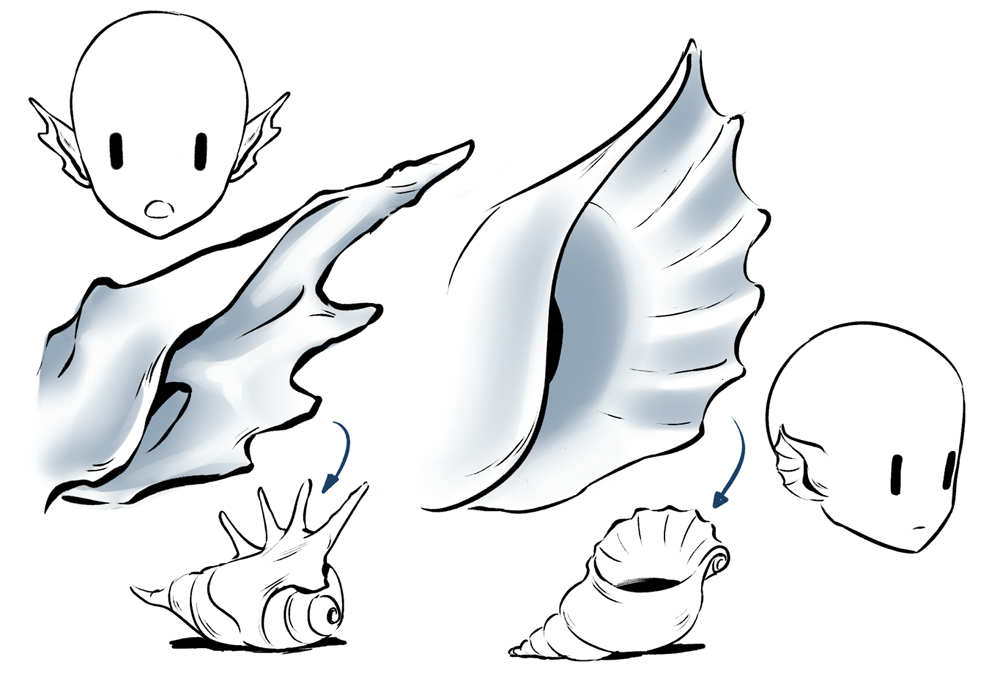
Aquatic beings:
When designing a grapheme, I beloved to introduce into them different elements of the globe that surrounds them. In the case of bounding main creatures, there is a lot we can get inspiration from ꟷfish fins, seashells, aquatic plants, etc. Then, imagine what your ears would be similar if they were based on these elements? The results tin be very interesting!
I followed the same concept of elf ears (long with pointed tips), just added elements of a fish fin…
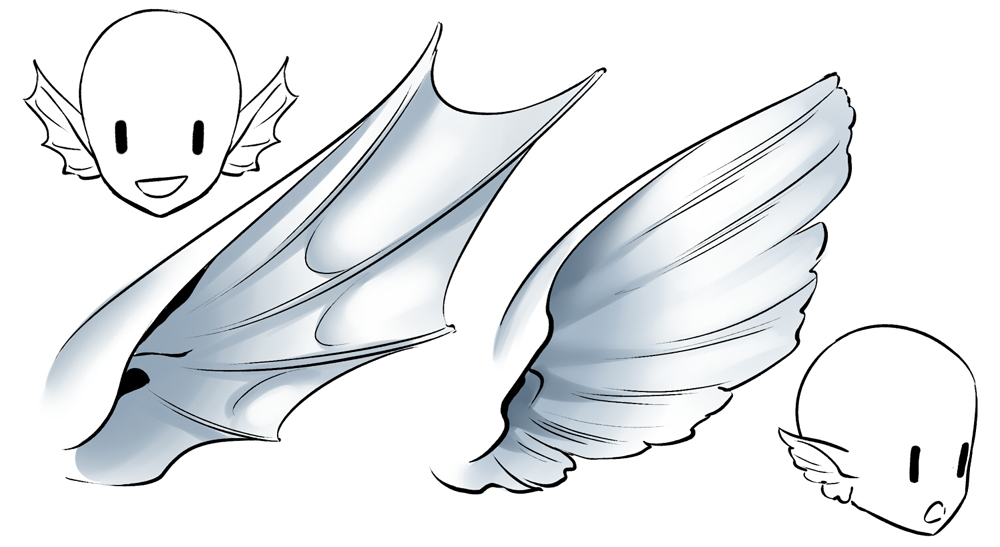
… or inspired by seashells! All of these work perfectly underwater!
Animals:
Since each species has unique ears, peradventure a little more inquiry and practice is necessary to accomplish this task. How do we go started?
- Collect and utilize skilful references from all possible angles, with plenty quality for detailed reference. If you lot are interested in a specific animal that you cannot meet in person, watch documentaries or videos that show the animal in move, suspension the picture when it's more interesting to you, and describe!
- Study their shapes, take note of their characteristics ꟷAre their ears hairy? Are their ears big with pointy tips? Practise they movement? Simplify and compose the drawing in your own way!
- To assist us with grapheme design, try to brand the ears express emotions. If nosotros accept a pet, let'south look at their ears. How exercise they react when our pet is sorry or happy?
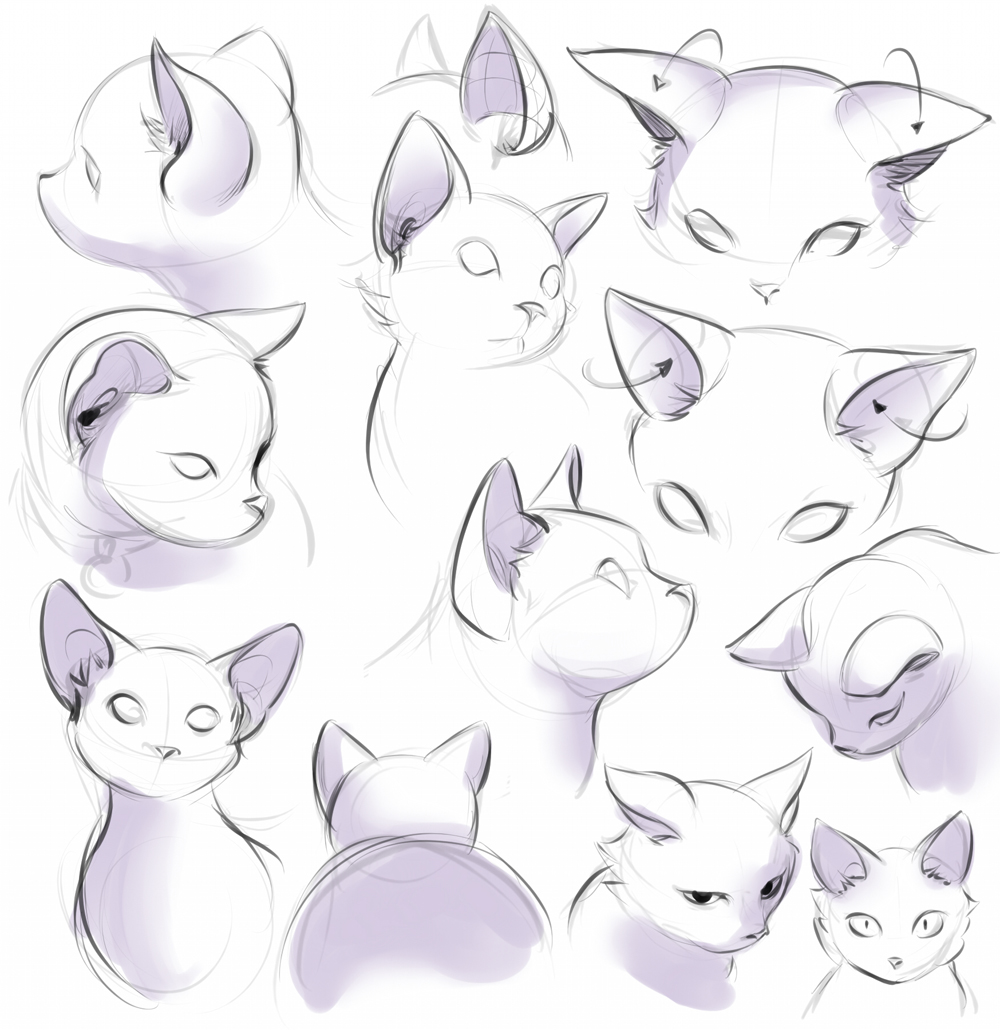
Cats:
We know that they have a reputation for being curious and stealthy creatures (more than or less). The ears of Siamese cats are very pointy and prominent; they heighten their personality while ever beingness alert.
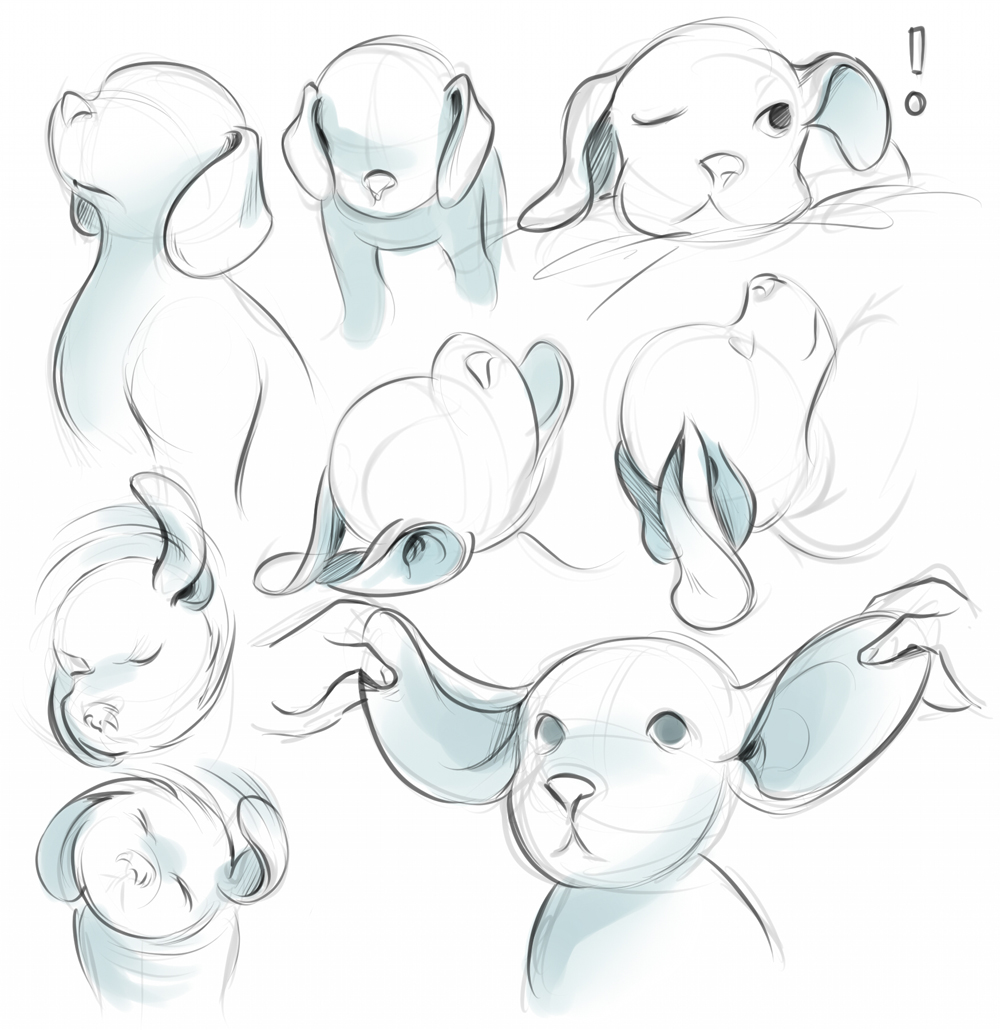
Dogs:
I really wanted to draw a beagle because of its really amusing ears. It was a real challenge, because they are playful doggies and their ears fly everywhere, post-obit their movements.
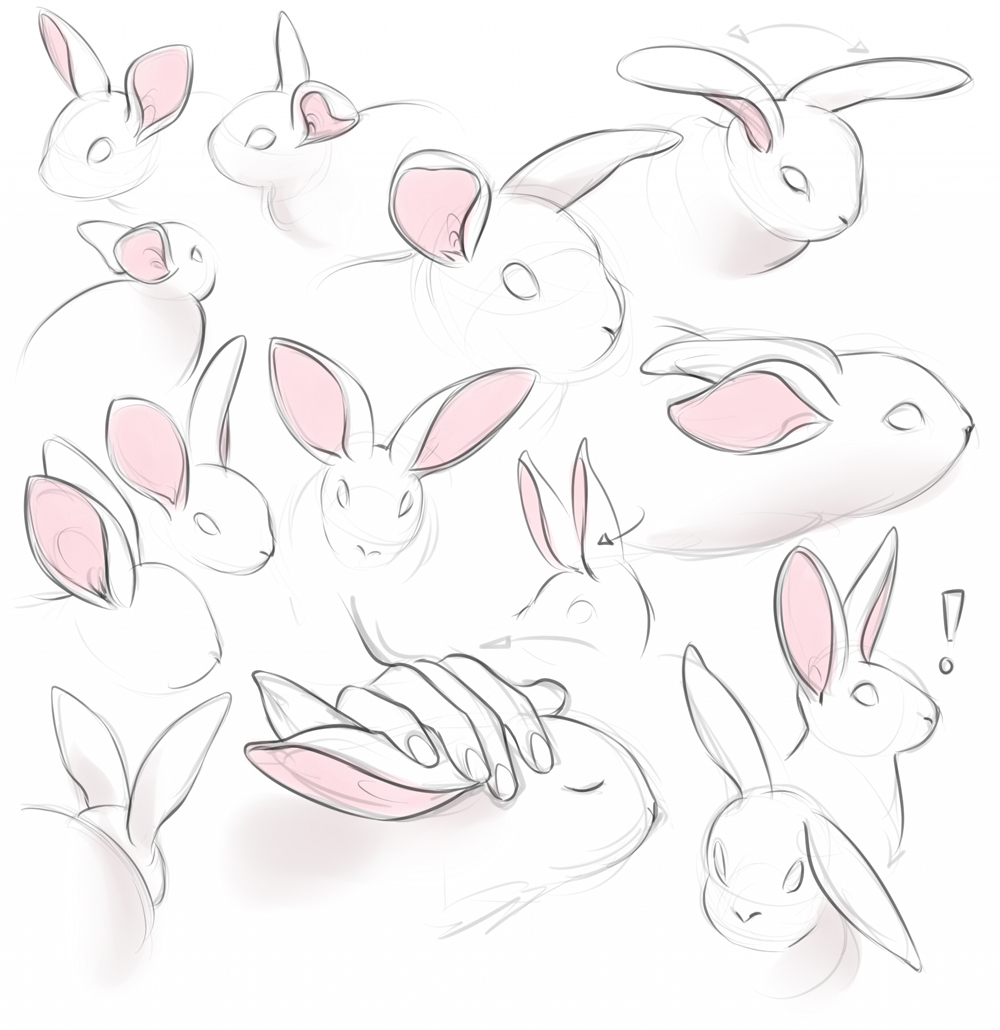
Rabbits:
Rabbits take long ears, but I was surprised that, compared to other types of rabbits, white rabbits' ears do non bend or fall, they are nigh always rigid or slightly arched.
Yous can't imagine how much you can learn once you start drawing, information technology is not plenty just to see, and so there are no excuses to practice!
I hope that you could find some helpful tips in this guide. Delight, check my social networks if you want to run across some more than examples of my work:
https://world wide web.instagram.com/eri_duh/
https://twitter.com/eri_duh
https://www.artstation.com/eridey
Thank you very much for reading!
– Eridey

Source: https://www.clipstudio.net/how-to-draw/archives/160418
Posted by: inmansomper.blogspot.com
0 Response to "How To Draw Ears Front View"
Post a Comment